
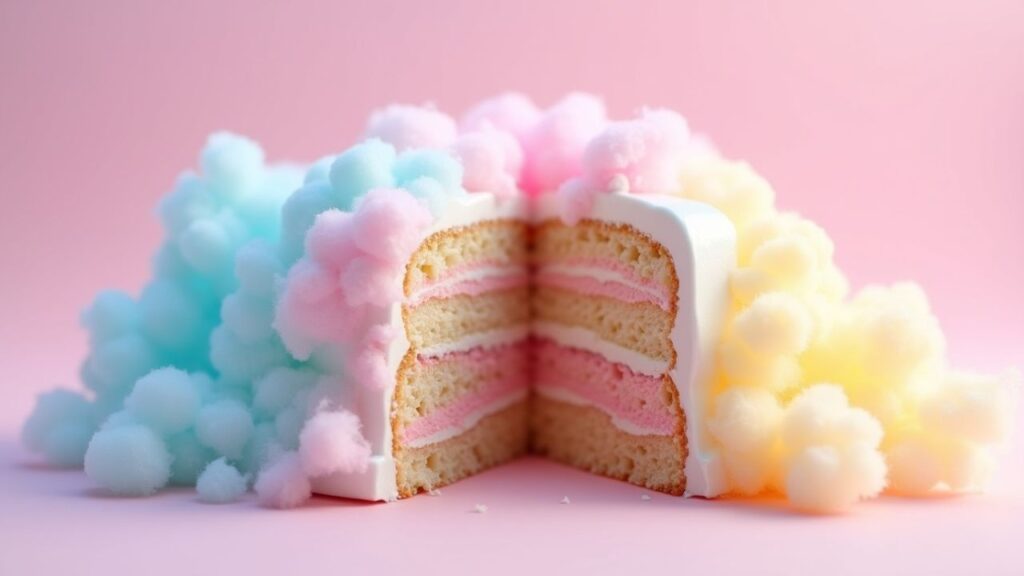
As you nest into a wedge of cotton candy cake, it seems that you are biting into a cloud filled with the sweet memories of the now long forgotten carnival days. The layers are fluffy, light in color and super-high, and the frosting is piled high like fluffy mountains. Yet, that is not the best part, and the more magic begins when you sprinkle a handful of real cotton candy on the top, making it an entirely spun-sugar freak-show.
Not just a cake, this cake is a whole experience, which makes ordinary parties become a celebration that you can use on birthdays, baby showers, or just any day where you feel like you want to be back at the carnival. What is the secret? It mixes lovely memories with current baking tips that anybody may learn. Forget about expensive bakeries or hard fondants—this tutorial shows you how to do it yourself.
You will prepare show-stopping desserts that make everyone remark, “How did you do that?” Whether you’re a beginning baker or an expert.
Essential Tools & Ingredients
And you will not have high technology devices! To start, you should have cake pans (6 inch size to get tall tiers and 8 inch size to get standard) and gel food colouring (pink, blue, and purple) and cotton candy floss (buy floss that is already spun, so that it becomes easy). A plain vanilla or white cake mix should be used however to make it fluffier you need to add more egg whites. And then there is the frosting? Swiss meringue buttercream (not too sweet) or whipped cream cheese icing (with just a touch of acidity). To make it more tasty, you can add cotton candy flavour (you can find in online stores), or you can grind the cotton candy into powder. Avoid liquid food colour because it affects the consistency of the batter.
Fluffy Cake Base Recipe
Let’s bake the perfect cotton candy cake layers! Mix:
1 box white cake mix
1 cup buttermilk (replace water)
⅓ cup vegetable oil
3 egg whites
1 tsp clear vanilla extract
Split batter into 3 bowls. Tint each with gel colors (pink/blue/purple). Bake in greased pans at 325°F (lower heat = fluffier!) for 18-22 minutes. Cool completely. Why this works: Buttermilk = tender crumb, egg whites = light lift. No dense cakes here!
Cotton Candy Frosting Secrets
Transform basic frosting into cloud-like magic! Whip this combo:
1 cup softened butter
4 cups powdered sugar
2 tbsp heavy cream
½ cup finely crushed cotton candy (no chunks!)
Pinch of salt
Whisk a half an hour, or beat till light. Too sweet? Add 1 tablespoon lemon juice. With pastel colors, add gel colors left-over cake batters. To resemble cotton candy puffs, pipe tall swirls!
Assembling Your Masterpiece
Stack it like a pro: Topping, cake, an extra layer of sprinkling and finally, again. Put a little frosting beneath the initial layer to make it stick. Brush each layer with cotton candy simple syrup (melt ½ cup of cotton candy in ¼ cup of boiling water) to add more flavour. Put it in the fridge for 20 minutes before adding the crumb coating (a thin layer of icing). After that, frost the entire cake evenly. Want some drama? It’s fashionable and simple to leave the sides “naked” with crumbs visible.
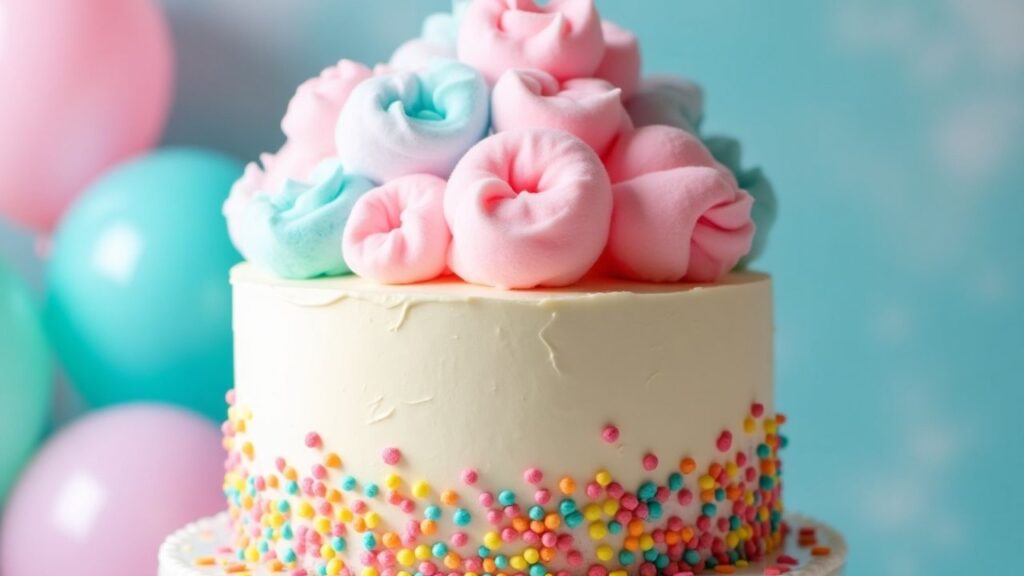
Decorating With Floss Magic
Here’s the fun part! Never add cotton candy more than 1 hour before serving—it melts. Right before presenting:
Press mini floss tufts onto frosting swirls.
Hang lengthy strands about the top layer out.
For a party-like feel, add lollipops, sparkles, or palatable sparkle.
Pro hack: Stick lollipops into cake pops hidden in the cake for support!
Flavor Twist Ideas
Level up beyond vanilla! Try:
Cotton candy + bubblegum: Add 1 tsp bubblegum extract to batter.
Berry floss fusion: Fold freeze-dried raspberry powder into frosting.
Tropical dream: Layer with coconut frosting + pineapple jam.
S’mores spin: Add crushed graham crackers between layers with chocolate ganache.
Avoiding Common Mistakes
Problem: Cotton candy melts into frosting.
Fix: Store extra floss in airtight jars with silica packets. Decorate last-minute.
Problem: Colors bleed into batter.
Fix: Use gel (not liquid) dyes and mix gently.
Problem: Cake tastes bland.
Fix: Add 1 tbsp cotton candy extract OR 2 tbsp crushed floss to batter.
Make-Ahead & Storage Tips
Bake ahead! Freeze unfrosted layers for 1 month. Thaw in the fridge overnight. Frosting lasts 3 days in the fridge—rewhip before using. Decorated cakes hold in the fridge for 24 hours, BUT add cotton candy only before serving. Leftovers? Slice and freeze in airtight boxes for 2 weeks.
Perfect Occasions to Serve
This isn’t just a cake—it’s a mood! Shine at:
Birthday parties (kids and adults!)
Gender reveals (use pink/blue floss)
Summer BBQs (pair with lemonade)
Unicorn-themed events (add gold horns)
Mental health wins (“I survived my week!” cake)
Why This Cake Wins Celebrations
It’s playful yet polished—no one expects homemade to look this pro!
Why This Cotton Candy Cake Guide Works
Zero Fancy Skills Needed: We skip fondant sculpting and airbrushing. If you can mix batter and spread frosting, you’re golden.
Budget Magic: Uses affordable cake mixes and grocery store cotton candy. No $50 specialty extracts!
Melting Solved: We respect cotton candy’s drama queen tendencies—timing tips prevent sad, sticky messes.
Customizable Joy: Swap colors, flavors, and themes to match any event. Princess party? Neon rave? Done.
Instant Wow Factor: That first reveal when you bring it out? Pure magic. 📸 Phones will come out!
Difference Table
| Feature | Classic Cotton Candy Cake 🎪 | Flavor-Twist Cake 🍬 | Easy-Bake Shortcut 🚀 | Last-Minute Party Star ⏱️ |
| DIY Level | From-scratch fluffy layers | Base recipe + fun extras | Cake mix hack | Store-bought cake + floss magic |
| Key Moves | Gel colors, crumb coat, Swiss meringue | Berry powder, bubblegum extract, tropical jam | Add egg whites & buttermilk to mix | Frost store cake, press on floss last-minute |
| Flavor Hacks | Cotton candy simple syrup between layers | Freeze-dried fruit in frosting, graham cracker crunch | Cotton candy extract in batter | Crushed floss mixed into whipped cream |
| Time Savers | Bake layers ahead, freeze | Prep frosting 3 days early | Use pre-spun floss bags | Skip layers – make cupcakes! |
| Best For… | Birthdays, baby showers | Theme parties, foodie friends | Beginners, busy weeks | Surprise treats, school events |
Conclusion
Cotton candy cake: candy where dreams and frosting have a meeting point–and you can definitely make it at home. It makes dessert a festivity with fluffy layers, silky pastel colours and the actual spun-sugar pizazz. Three golden rules and you know them all: use gel colors only, add floss last and enjoy! This cake is big, luscious and dons down the milestones or satisfies a need to feel good. Just put your mixer on, whirl up some sweet and see eyes sparkle. Your inner child (and your guests) will make sure you stay grateful to yourself.
FAQ’s
1. Can I use regular food coloring?
Gel food coloring works best! Liquid dyes can water down your batter and make colors look faded. Gel gives vibrant pastels without changing texture.
2. How do I stop cotton candy melting?
Decorate right before serving! Humidity makes it dissolve fast. Keep extra floss sealed with a silica packet until the last minute.
3. My cake tastes bland—help!
Boost flavor by adding 1 tsp cotton candy extract to batter or frosting. Crushing extra floss into powder (no chunks!) works too.
Can I Prepare Parts in Advance?
Absolutely! One month before serving you can freeze or bake layers. It is possible to prepare the frosting 3 days prior; simply, re-whip it and apply on cupcakes. Do not put any floss decorations till time of serving.
5. Is this cake hard to make?
No, indeed! It applies simple secrets of making cake mix and easy frosting. The decoration is easy- simply press on floss at the last minute. It is just right to the interest of a novice!